ToolSpring Plugin
ToolSpring Plugin
The ToolSpring plugin enhances the Jenkins user interface with views that include:
- A quick view of your ToolSpring product subscriptions.
- A tool for managing your product subscriptions and commercial plugin installations.
- A portal to discover products in the ToolSpring shop.
Getting Started
If the ToolSpring plugin is not yet integrated with your Jenkins, follow the steps below to install the plugin.
- The plugin is installed as a file named toolspring.hpi - click the following link to download the file: https://toolspring.com/jenkins-integration-download/
- Open the Jenkins Plugin Manager and use its Advanced tab to upload toolspring.hpi to your Jenkins. This step completes the installation. You may need to restart Jenkins in order to use the plugin.
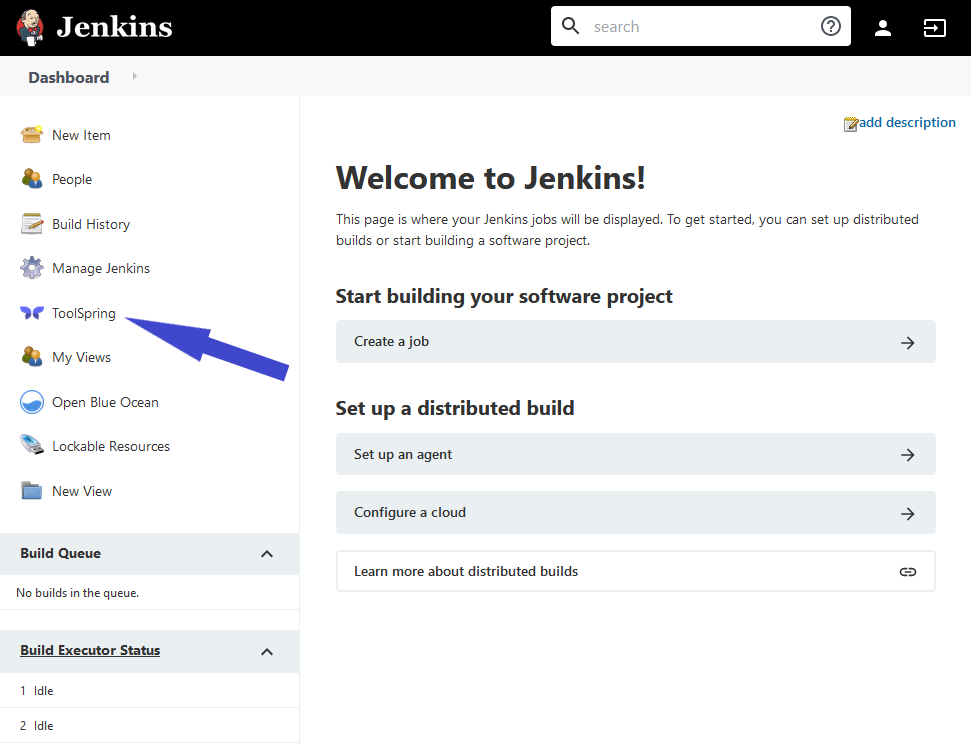
After installation you will find a new item ![]() ToolSpring on the Jenkins home page configuration panel (at top left), as shown below.
ToolSpring on the Jenkins home page configuration panel (at top left), as shown below.
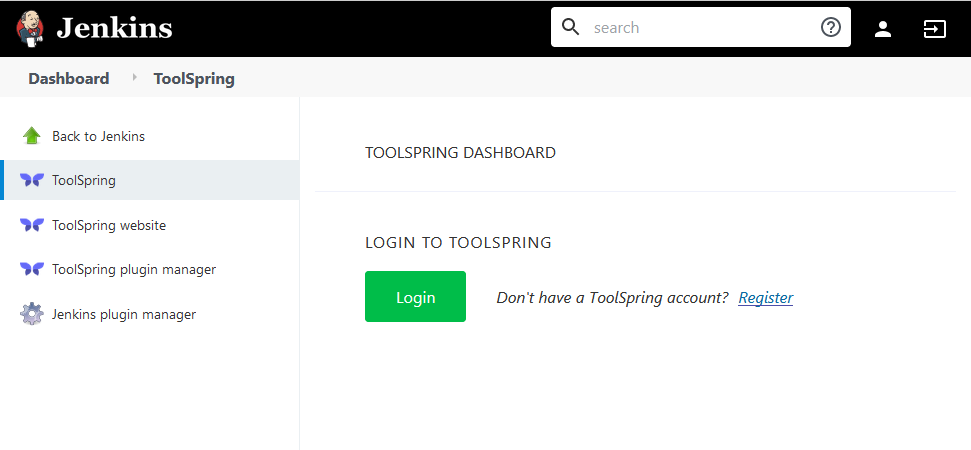
Click ![]() ToolSpring to open the ToolSpring Dashboard, shown below.
ToolSpring to open the ToolSpring Dashboard, shown below.
ToolSpring Dashboard
Note the custom links on the configuration panel, at top-left of the page:
 ToolSpring website: A website where you can shop for commercial plugins for Jenkins and support for open-source plugins, or publish your own products.
- ToolSpring plugin manager: This is part of the ToolSpring Dashboard, and consists of:
- A tool for managing your product subscriptions and commercial plugin installations (see article: ToolSpring Plugin Manager).
- A portal to discover products in the ToolSpring shop.
The first time that you open this page, the main content area shows only two options:
- Login to ToolSpring if you have registered a ToolSpring account.
- Register a ToolSpring account.
Home Page
After a successful login the ToolSpring plugin home page opens, as shown below.
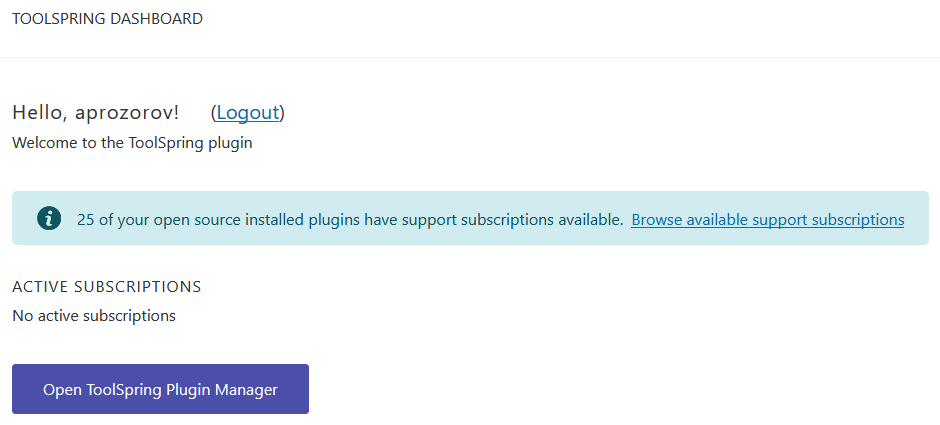
The above sample shows the home page for a user who has no product subscriptions.
The blue band below the Welcome message is an alert; in this sample it shows the number of installed open-source plugins which have corresponding products in the ToolSpring shop. Click the link Browse available support subscriptions to view the Support tab of the ToolSpring Plugin Manager (see ToolSpring Plugin Manager - Support Tab).
If you need to logout (for example, to login as a different user), click the link Logout.
The button Open ToolSpring Plugin Manager has the same effect as the link ![]() ToolSpring plugin manager in the configuration panel (see above, section ToolSpring Dashboard).
ToolSpring plugin manager in the configuration panel (see above, section ToolSpring Dashboard).
The sample below shows the Dashboard for a user who has three product subscriptions, two active and one expired.

Subscription Summary
The lower area of the Dashboard shows a list of your active subscriptions for ToolSpring products.
If you have expired subscriptions, the lower area shows these subscriptions in an additional list, as shown in the sample above.