ToolSpring Plugin Manager
ToolSpring Plugin Manager
The ToolSpring Plugin adds views to the Jenkins web interface including the ToolSpring Plugin Manager, which is:
- A portal for discovering products in the ToolSpring shop, which include commercial plugins and commercial support for your installed open-source plugins.
- A tool to manage your product subscriptions and commercial plugin installations.
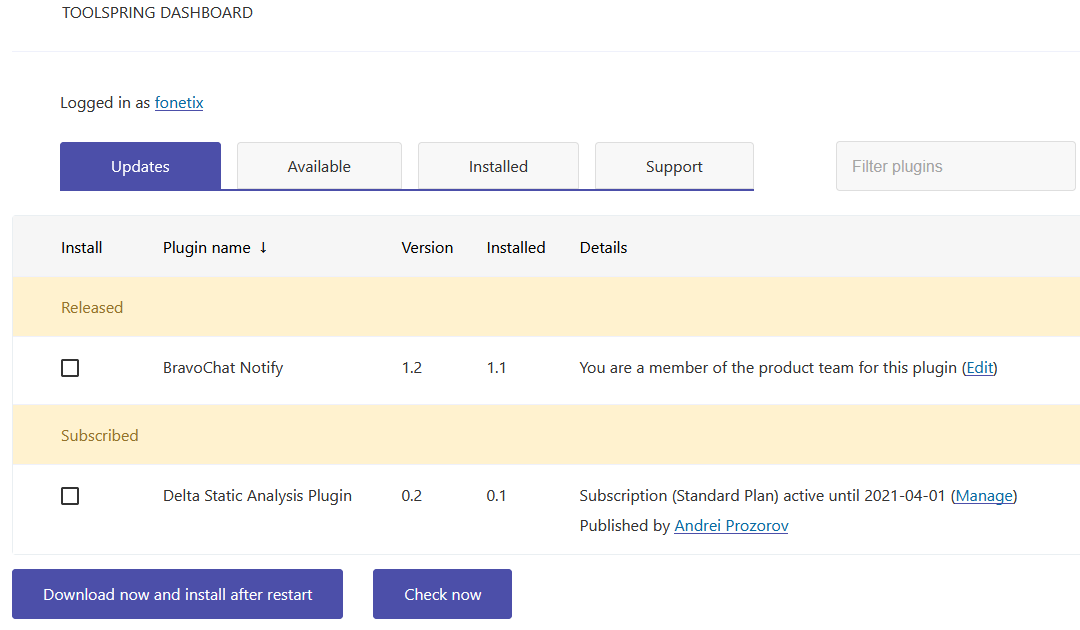
In some respects the ToolSpring Plugin Manager is similar to the Jenkins Plugin Manager. Depending on your installed version of Jenkins, the ToolSpring Plugin Manager may have a different color scheme. Below is a sample:

The sample above shows four tabs at the top of the main content area: Updates, Available, Installed, and Support. Each tab provides a tabular view of plugins or support subscriptions.
To quickly find a plugin on the active tab, enter text in the Filter plugins field at the top-right of the page.
To reverse the sort order on the active tab, click the column header Plugin name.
To synchronize the displayed list of plugins with the ToolSpring Plugin index, click the button Check now.
The sections below describe the tabs in detail.
Updates Tab
The Updates tab is the default tab of the Plugin Manager; see the screenshot in the previous section. This tab lists every installed commercial plugin whose version differs from current public version. Usually the public version is higher than the corresponding installed plugin, but a publisher may revert to a lower version if, for example, there are problems with the latest release.
The table lists plugins grouped by the subheadings below:
- Subscribed: Plugins that you have purchased subscriptions for.
- Click the link Manage to view your subscription details in ToolSpring, manage automatic renewals, or open a support ticket.
- Click the link Renew to open your subscription in ToolSpring, to order a renewal. This link is shown when a subscription has expired.
- Click the link showing the publisher's name, e.g. Andrei Prozorov in the screenshot, to view that publisher's page in the ToolSpring shop.
- Released: Plugins that are produced by a product team you belong to. Click the link Edit to edit the product settings in ToolSpring. This subheading is shown if you logged in as a registered ToolSpring publisher.
To install one or more updates, check the box in the Install column for each update you require, then click the button Download now and install after restart
Available Tab
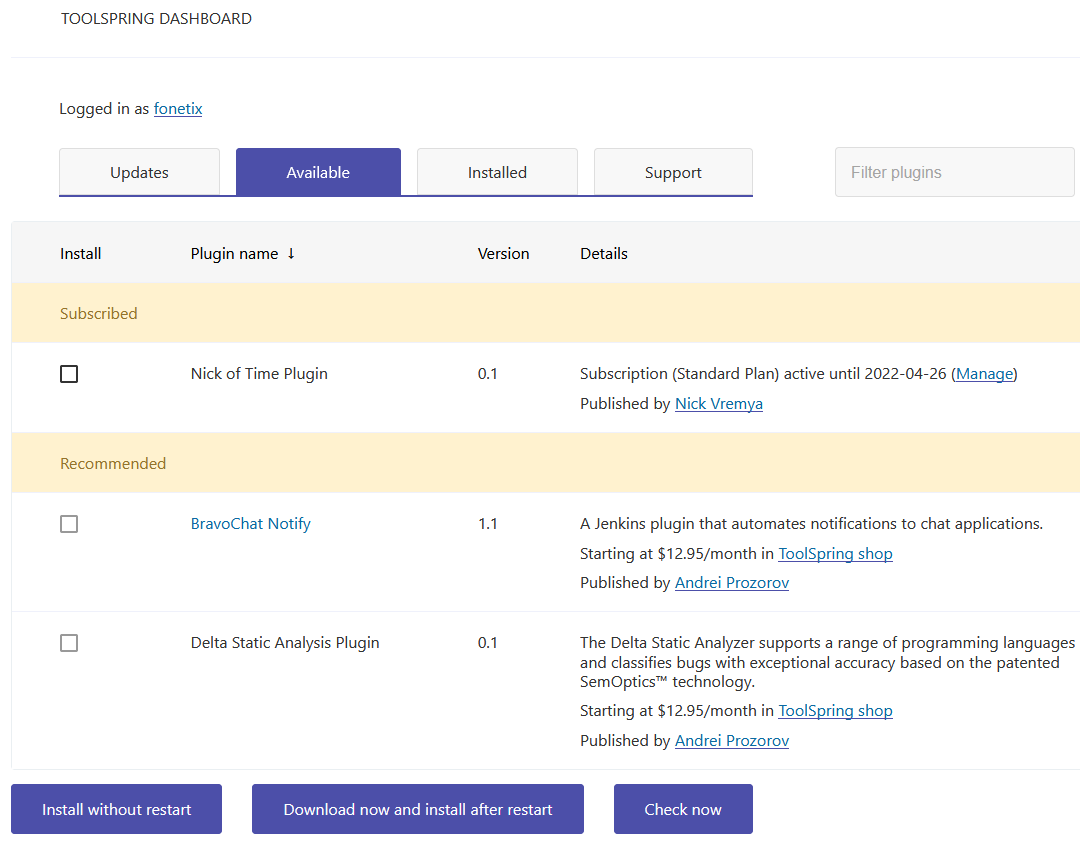
The Available tab lists commercial plugins that are available in the ToolSpring shop and are not installed in your Jenkins. Below is a sample:

The table lists plugins grouped by the subheadings below:
- Recommended: Plugins that you have not purchased. Click the link ToolSpring shop to view the product's page in the shop, where you may purchase a subscription.
- Subscribed: Plugins that you have purchased. See also section Updates Tab above.
- Released: Plugins that are produced by a product team you belong to. Click the link Edit to edit the product settings in ToolSpring. This subheading is shown if you are a registered ToolSpring publisher.
To install one or more plugins, check the box in the Install column for each plugin you require, then click the appropriate button for you:
- Install without restart
- Download now and install after restart
Note: For plugins in the Recommended group, the checkbox in the Install column is inactive and cannot be checked.
See also section Advanced Installation below.
Installed Tab
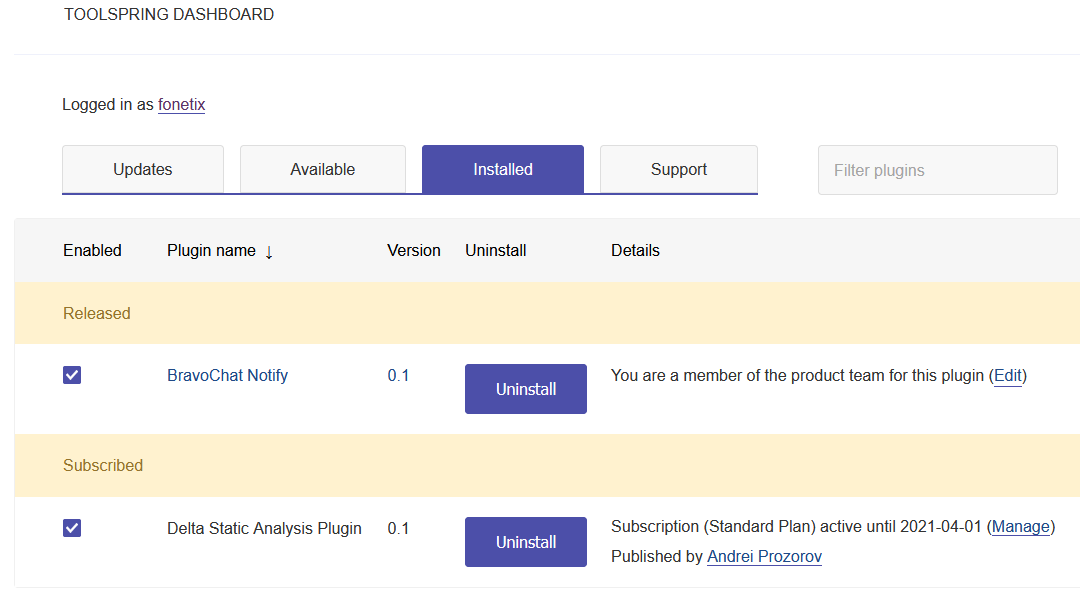
The Installed tab lists your installed commercial plugins. Below is a sample:

The table lists plugins grouped by the subheadings below:
- Subscribed: Plugins that you have purchased. See also section Updates Tab above.
- Released: Plugins that are produced by a product team you belong to. Click the link Edit to edit the product settings in ToolSpring. This subheading is shown if you are a registered ToolSpring publisher.
Click the button Uninstall to uninstall the corresponding plugin.
Enabling or Disabling Plugins
It may be useful to disable a plugin instead of uninstalling it. For example, a plugin can cause conflicts with other plugins; such conflicts can be detrimental to Jenkins' operation. You could uninstall the plugin but disabling it may be more convenient.
For each installed plugin, the checkbox in the Enabled column is checked by default. This means that when Jenkins starts it will start the plugin automatically. Uncheck the checkbox to prevent a plugin from starting.
Note: For some plugins the checkbox in the Enabled column is inactive and cannot be unchecked. These plugins are not safe to disable because other plugins depend on them.
Support Tab
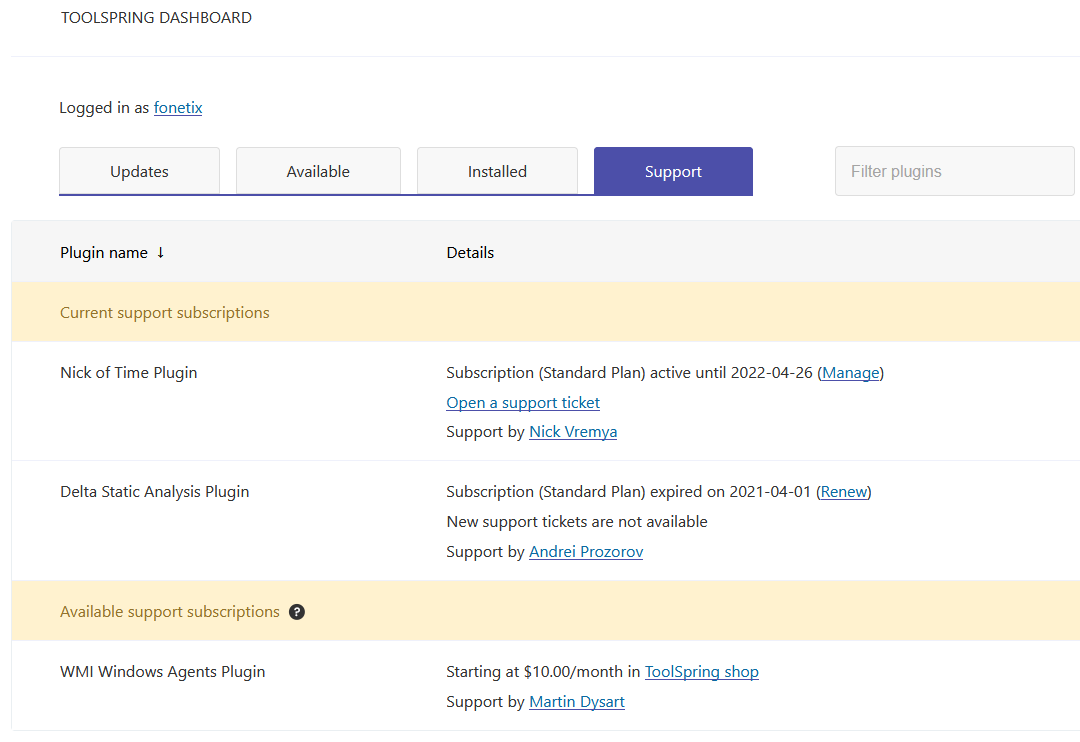
The Support tab lists support subscriptions that you have purchased, for commercial or open-source plugins. It also lists support subscriptions that are available in the ToolSpring shop for open-source plugins that are installed in your Jenkins. Below is a sample:

The above sample shows that:
- The user has an active subscription for plugin BravoChat Notify, which is a commercial plugin.
- A support subscription is available for an installed open-source plugin, WMI Windows Agents Plugin.
The table lists plugins grouped by the subheadings below:
- Current support subscriptions: Subscriptions that you have purchased, for commercial or open-source plugins. The Details column shows a summary of the subscription, and links to ToolSpring. Click the link Open a support ticket to open a ticket form in ToolSpring, where you can enter the details of your enquiry.
- Available support subscriptions: Subscriptions that you have not purchased, for your installed open-source plugins which have support products in the ToolSpring shop. The Details column shows the minimum price of a subscription, and links to pages in ToolSpring:
- The product's page in the shop.
- The publisher's page in the shop.
Note: An open-source plugin that is not installed will appear in the list only if you have purchased a support subscription. To install an open-source plugin, use the Jenkins Plugin Manager.
Advanced Installation
The ToolSpring Plugin Manager is designed to simplify the installation of plugins from ToolSpring. If required, follow the steps below to use the normal Jenkins method for advanced installation:
- To install a plugin you will need its .hpi (or .jpi) file. To obtain this file, open your customer dashboard in ToolSpring and view the details of your subscription for the plugin, then go to the Install tab and click the download link.
- To install a plugin file, open the Jenkins Plugin Manager and use the Advanced tab to upload the file to your Jenkins. This step completes the installation. You may need to restart Jenkins in order to use the plugin.
